
BEST SUMMER SIDES FROM MORE TIME AT THE TABLE HERE.
It’s more than ironic that many of the best fruit pies need to be made when the weather is sizzling, sultry, humid, or plain old drippy hot. As a cold-weather fiend, I particularly find this one of the most unhappy cooking situations. I am thus incredibly blessed to live in Colorado where the summer days may be hot, yes, but might also occasionally dip down into the 40’s and even more often into the 50’s with the advent of a good, old-fashioned hail and/or rain storm. In fact, nightly fifty-some temps aren’t unusual even without rain. (Of course that’s why our tomatoes don’t do squat. Thank God we have the best beer in the country to partially make up for that.)
below: yesterday on the road between Denver and Colorado Springs


You (and I) can then light that 425 degree Fahrenheit oven and not worry about spending the rest of the day in front of the fan in the basement.
Of course the other side of that summery coin is the time we can spend in the yard, on the deck, on the patio, or at the park. And, no matter what you make, the food is always totally fabulous, isn’t it? Let’s talk about the difference between eating a hotdog in your kitchen vs at the ballpark. How about watermelon in the grass or at the dining room table? Cold beer after mowing or while sitting in front of the tv? Pancakes at the campsite vs the counter in the apartment? Wine and cheese on a blanket at the park concert? See?

And so it is with the fun food we make for the biggest of all summer holidays, the 4th of July. If it’s not outdoors, it’s just not right. There needs to be sand in your shoes, flies shooed off food, babies miraculously asleep during fireworks, dogs panting after dripping ice cream cones, or overdone cold burgers or brats that still make your mouth sing. Whether you’re at the beach, in someone’s backyard, or sitting by the park bandshell, it’s the perfect time for everything that we’re happiest consuming al fresco (in the fresh air).
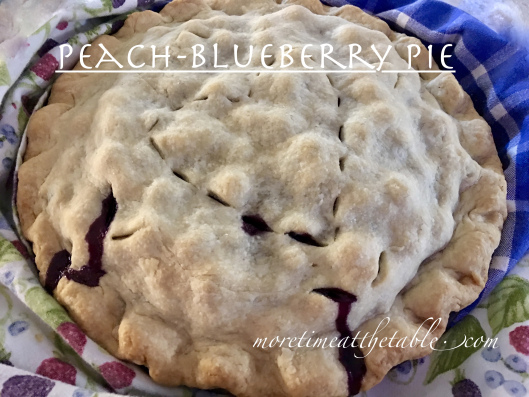
Above: Try my Peach-Blueberry when the peaches come in. Freeze some blueberries now to be ready. The northwestern blueberries are peaking and at their least expensive–just throw them unwashed into gallon bags and freeze.
To make it all a bit sweeter, why not bring pie? You’ll be the star of the pot luck, the most-sought-after person at the picnic, and for sure the total smile-maker. All because it’s simply the dessert that makes people’s eyes widen and eyebrows raise or suddenly run to the store for ice cream or ask for a piece to take home, please?
I give directions below for making the pie dough from scratch, but if that’s stopping you from baking a pie, blessings on grabbing some Pillsbury crusts next time you’re at the store. Got someone who can’t eat crust? Butter a ramekin and add filling about 3/4 of the way up for an individual crustless version. (It won’t be gluten-free unless you swap out the flour in the fruit filling for a GF version.) Bake the baby pie at the same time as the big pie, watching to take it out early and when it’s good, hot, and bubbly.
Need extra pie info? Scroll down below the recipe.
If you do make my (your) pie, be sure to add vanilla ice cream when serving (melted, right?!) for a cheerful red, white, and blue presentation:

CHERRY-BERRY PIE FOR 4th OF JULY
makes a 9 inch lattice crust pie (not deep dish) serves 6-8
A red fruit pie is gorgeous with a lattice crust, but a regular two-crust version is just as delicious if you prefer that. Need to leave out the almond extract due to allergy concerns? Use vanilla extract in the filling. The egg wash can also be left off if needed; a sprinkle of granulated sugar will still give the pie a bit of a sheen. Serve with vanilla ice cream for a “red, white, and blue” dessert.
INGREDIENTS FOR PIE DOUGH:
- 2 2/3 cups unbleached white flour
- 1 1/2 teaspoons kosher salt
- 1 tablespoon granulated sugar–plus extra for sprinkling on the crust before baking
- 1 cup (8 ounces or two sticks), very cold or frozen butter—cut into pieces about 1 tablespoon (1 ounce) each I like salted butter, but you can use unsalted if you prefer.
- ½ cup (4 ounces) ice water or a bit more if needed (I measure 1/2 cup into a liquid measuring cup, add 2 ice cubes, use that, and add more if I need it.)
For the top of the pie crust: 1 egg whisked together with 2 teaspoons water
INGREDIENTS FOR FILLING:
- 15-ounce can tart cherries in water, drained (not cherry pie filling)
- 1 cup fresh or frozen blueberries (if frozen, rinse and pat dry)
- 1 1/4 cups sliced fresh strawberries
- ½ cup white granulated sugar
- ½ teaspoon finely ground sea salt
- 3 tablespoons flour plus a little extra for sprinkling on the bottom crust before filling
- ½ teaspoon almond extract
- 2 tablespoons unsalted butter, cut into bits for topping the filling before adding the lattice crust
INSTRUCTIONS:
Make crust:
1. Place flour, salt, and cold butter in a food processor or regular bowl. Using the steel blade of the food processor, two knives, a pastry cutter, or your fingertips, cut the butter into the flour and salt until dough is peppered with several different size pieces of fat and flour–bigger and smaller than peas.
2. With machine running, or while stirring, pour (drizzle if making by hand) ice water into dough in a steady stream. Process or stir (you can use your hands, but the warmth isn’t the best thing for pie dough) until the dough just barely comes together. Remove carefully from bowl or food processor, if using, and knead a bit, to bring dough together.
3. Form into a large ball quickly and cut into two even halves. Wrap each well and refrigerate for 30 minutes OR:
Alternately, roll dough immediately and complete the pie using the lattice crust instructions in the links below. You will then need to refrigerate entire pie for 20 minutes before baking. I find this method easy and effective.
below: chilling out before baking

Make the filling, roll one pie crust, and fill it:
- Preheat oven to 425 degrees Fahrenheit and place rack at center.
- In a medium bowl, stir together the cherries, strawberries, blueberries, sugar, flour, salt, and almond extract. Set aside.
- Flour a board or counter and roll one pie crust out to an inch larger than the pie plate. (10 inches) Fold into fourths and fit gently into pie plate without stretching.
- Trim edges to 1/4-1/2 inch over the pie plate. Sprinkle bottom of crust with a teaspoon of flour. This helps to keep the crust a bit crispier.
- Spoon fruit filling into the pie shell and smooth out evenly.
Top the pie filling with butter and add the lattice crust:
1. Dot the pie filling evenly with the 2 tablespoons of butter cut into bits.
2. Fit the pie with the lattice crust. See links below for instructions. Crimp edges of crust.
3. Carefully and gently brush the crust with a little of the egg mixture.* Sprinkle lightly with granulated sugar.
Bake, Cool, and Serve Pie:
1. Place pie on a rimmed baking sheet and place in oven. Bake for 15 minutes.
2. Reduce temperature to 375 degrees Fahrenheit and bake another 30 minutes or until golden and bubbling. Lay a sheet of aluminum foil lightly over top if pie begins to brown too quickly, but hasn’t yet bubbled up through the lattice.
3. Remove pie to a rack and let cool completely before cutting.
4. Serve with vanilla ice cream, if desired.
STORAGE: Store a fruit pie in cool weather 2-3 days, well-wrapped, on the counter. Refrigerate in hot weather after cooling. Pie keeps well-wrapped in the refrigerator 4-5 days. Freeze, well and tightly wrapped, 6-8 months. To thaw: remove from freezer, let sit several hours before unwrapping and cutting to serve.


LATTICE CRUST LINKS:
To make the lattice crust –video by King Arthur Flour
How to make a lattice crust by Simply Recipes (step by step photos)
A LITTLE ABOUT DOUGH, BUYING PIE PLATES, AND MAKING PIE
PIE DOUGH:
Much has been said about the fear involved in making pie dough. I won’t go into it except to say this: try and try again. It’s not that difficult and you’ll eat anything you make. Soon you’ll be making gorgeous crust. Want some real detailed info? Check out one of my Pie 101 posts; there are several. Here’s a basic two-crust Rhubarb Pie 101 that will help.
Truth in pie baking: Once in a while even experienced pie bakers just through a crust into the garbage and start again. Breathe in and breathe out. It’s just flour, butter, salt, and water.
If you’ve used a purchased crust, read here: Before you need another pie, attempt a trial run using my dough (below) or the much simpler Violet’s Crust in my Mother’s Day post. Be like Winston Church and nevah give up! Pie is worth it.
Afraid about rolling out the dough? Check this out!
Making pie dough without a food processor
PIE PLATES:
My favorite pie plate is the basic inexpensive Pyrex plates that come in 9″ X 1 1/2″ inches. They used to come in 10″x2″, too, as well as 8″ or 11″ but these treasures are now usually only available in thrift stores, at garage sales, on on eBay. If you shop at warehouse or grocery stores for pie plates, they’ll often only have a 9 1/2 -inch deep dish available. Do a bit more research to find and buy a regular pie plate, which is 9″ x 1 1/2″ deep. Not all pies are meant to be deep dish! Do search out some other sizes, too, as they’re sometimes simply necessary! Perhaps you don’t have 8 apples, but you have 6, for instance. Or you need 10 slices of pie and don’t want to bake 2 pies. You get the picture. A 10″ or 11″ pie will feed a lot more people than and 8″ or a 9″.
Occasionally at holiday time, you’ll see a set of inexpensive individual pie plates. Grab them! They’re so fun for individual quiches or for the time when you have a bit of extra dough and just enough pumpkin pie filling for someone to have their own pie.
There are, of course, lots of beautiful ceramic pie plates at higher prices (though many of them are deep dish, too). If you see a good sale, grab one!
Do skip the aluminum pie plates; they’re just too flimsy for baking hot pies. Put one inside a real pie plate if you’re desperate. Otherwise they’re great for sending home leftovers or for freezing a couple of pieces you’re saving for someone special who couldn’t make it to dinner. If you need to take a pie somewhere and leave it, just write your name on the bottom with permanent marker.
Food and Wine’s Review on Pie Plates
Wire Cutter’s Best Pie Plate Review
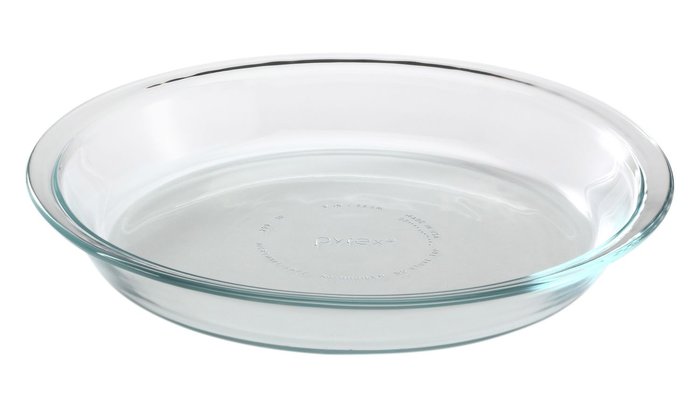 above: I like a glass pie plates because I can see if the pie is browned on the bottom and I feel as if the pie cooks more evenly than in a thin metal pan.
What about the stories of Pyrex shattering? Read all the details here.
“Avoid sudden temperature changes to glassware,” the Pryex website reads. “DO NOT add liquid to hot glassware, place hot glassware on a wet or cool surface, directly on countertop or metal surface, or in sink; or handle hot glassware with wet cloth.”–PYREX website

Bluebarb Pie with Violet’s Crust — recipe and story
Want more pie? Just put Pie in the search box at the top of the blog and begin scrolling. You’ll find everything from quiche to pumpkin pie to pear crostata and back again. There are several savory pies, as well, because pie isn’t just for breakfast anymore. You can also be more specific and use a term like Apple Pie, which will bring you a few things, including this basic goodie, first made for my dear St. Paul hairdresser at her shop called CURL UP AND DYE, which was just a block from my house.

Bake your pie,
Alyce