
I’ll begin by saying I’ve made a little more of this bread over the last week than I ever intended. Look at that face. Just look at that face. Isn’t that sweetness canine-i-fied? Lord, I love this dog.

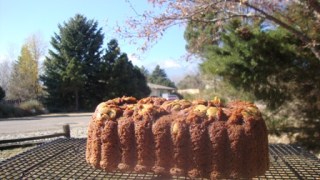
… Yep, she ate the better part of two loaves of this bread I made to test and update an old recipe and to have for my Bible study to eat with their coffee when they came for an Advent lunch. (By the way, that meal is then served with a few bottles of nice wine. If it was good enough for Jesus, it’s good enough for me. You might guess we’re a progressive sort of church.) I rarely bake in the afternoon; I need the morning freshness of mind and strong light to concentrate on baked goods. Somehow, though, I only had time after lunch that Friday and while I made dinner, the beautiful loaves were cooling on a rack on the counter. Kind of like these….

Dave and I loaded up our dinner plates, grabbed glasses of wine, and went downstairs to watch a Christmas movie–a typical December evening. When the breads cooled, I’d run up, wrap them tightly and well, and snuggle them into the freezer all ready for the next week. But when I finally got there — albeit a little later than I planned — one loaf was snarfed : GONE! POOF! and the other was nearly bitten in half. While this isn’t the first time this has ever happened to me (the raccoons have done the same on a camping trip or two and I’ve had dogs who’ve eaten most anything), I was gobsmacked and angry. Not only had Rosie eaten something not good for her (she survived), I had to re-do the work, as well as again bake the sadly failed Gluten-Free versions I’d made earlier in the day. Those, despite copious time in the oven, had never gotten done and had ended up in the garbage, too. (Ah, sigh: Gluten-Free baking. Let’s admit I threw them into the garbage with a little more force than was totally necessary.) It was a pumpkin bread trash day that sent me into the living room to chew that up and swallow it while figuring out where I’d get another 4 hours for the prep, baking, and cooling all of those loaves. Needless to say, I first saved the surviving half loaf by cutting off a discardable first inch, then sticking the rest in the fridge for our Saturday morning breakfast–definitely a fine Julia Child moment. Next, I added the breads to the already full Monday cook list. Not much more was happening on that day after that addition. Meanwhile, there was the rest of the movie to see, though there were a few audible sighs and choice words on the way down the stairs. Maybe some unhealthful gnashing of teeth, too. Help me.
GLUTEN-FREE PUMPKIN BREAD EASY SOLUTION: Buy the Gluten-Free Pumpkin Bread and Muffin Mix from Trader Joe’s–tasty, easy, and it works.
Getting ready to write this post, I re-read the original work, photographed in 2009 with an inexpensive 5-inch travel CANON camera, and rewrote the messy recipe. One paragraph read like this:
Just use canned pumpkin.–Don’t kill a pumpkin to make this bread because the bread is no better and you might as well carve the pumpkin. Same is true for pumpkin soup. Same is true for pumpkin pie. I hate to take you away from all that cutting and hand-sliming opportunity, but I tell you the truth. I’ve done it both ways and I know. –
There are people whose incomes depend on canning pumpkin. Let them do it.
I’m not sure that in ten years of blogging I’ve learned as much as I’d like to have learned, but many opinions have come and gone. That particular one, however, hasn’t changed. I like canned pumpkin. Libby’s is my fave. (Keep it a year and it improves in flavor. Learned that from my FIL, Gene Morgan.) And I can write a little bit better recipe these days–or at least I think I can, thank God.
My bread is sweet and savory all at the same time. It makes a tidy, fast breakfast, a great afternoon snack, or an interesting accompaniment for simple soup or salad. Try this plain, with salted butter, or with softened cream cheese beaten with honey and find out:

pumpkin-chocolate chip bread
Ingredients
- ½ cup EACH dried cranberries and raisins
- ½ cup EACH semi-sweet chocolate chips and chopped walnuts
- 3 ½ cups PLUS 2 tablespoons all-purpose unbleached flour, divided
- 2/3 cup salted butter,softened
- 2 cups canned puréed pumpkin (I like Libby’s.)
- 4 large eggs
- 2 ½ cups granulated sugar
- 2/3 cup evaporated milk–can sub regular milk
- 2 teaspoons baking soda
- ½ teaspoon baking powder
- 1 ½ teaspoons salt
- 1 ½ teaspoons ground cinnamon
- ½ teaspoon freshly ground nutmeg
- ¾ teaspoon ground cloves
Instructions
- Preheat oven to 350 degrees Fahrenheit and set rack at center. Grease and flour two 9”x5” loaf pans using one of the tablespoons of flour.
- In a small bowl, stir cranberries and raisins together with a cup of hot water; set aside for 5 minutes and then drain.
- In another small bowl, stir together the chocolate chips and walnuts with the other tablespoon of flour; set aside.
- In a large bowl, beat the butter until smooth. Add the pumpkin eggs, sugar, evaporated milk, and drained cranberries and raisins and beat until well-combined.
- On top of the pumpkin mixture, measure the dry ingredients: 3 ½ cups flour, baking soda and powder, salt, spices, and reserved chocolate chips and walnut flour mixture. Using a small spatula, combine just the flour mixture briefly while still on top. Blend all of the ingredients together until just well-combined. (Little flecks of butter may remain that will disappear in the baking.)
- Divide the batter between the prepared pans and bake about an hour or until a toothpick inserted at the center comes out clean or very nearly clean. (Turn and switch pans half-way through baking period.) Remove pans to a rack for 5 minutes. Using pot holders or mitts, bang each pan firmly on the counter and turn bread out onto rack to cool completely, using a small sharp knife to loosen edges if necessary. (Muffins: Bake at 400 degrees F for 15-17 minutes.)
Notes

MUFFINS: This recipe makes lovely muffins. You’ve heard this before if you read the blog… but if not: Skip the muffin papers (be green) and bake them right up in well-greased muffin tins for a crisp outside and a tender crumb inside. Textural differences are everything in muffins and the papers or other liners, while easy and fast and sometimes cute, will cause condensation that prevents crunchy browning and may even add a taste you weren’t planning on. Exceptions might be when you’re making boo-coo muffins and lots of hands will be reaching for them out of a basket or off trays. In that case, liners are helpful for hygienic and health reasons. NOTE: Large muffins can also be baked in well-greased oven-safe coffee mugs, ramekins, or bowls, such as the cup above which is porcelain, made in France by Apilco, and is microwave, oven, and dishwasher safe. My everyday dishes are Apilco and they can all go in the oven, though I don’t put them in above about 350 degrees F. (Muffin photo from original 2009 post.)
want a big jumpin’ gingery pumpkin loaf?
I’ve been making pumpkin bread for so long that I don’t remember when I began. I make 2 basic versions with lots of variations: this one and another that pretty much is an explosion of ginger as it features candied, minced, and ground versions of the spice. (Ginger is a tropical plant, legally a vegetable, but we eat the rhizome or root and name it a spice. I just looked that up! You’re welcome.) Both the recipe and post need rewriting, but you can still make the bread if you’re willing to plow through my mess from 2009: Pumpkin-Ginger Bread.

What are you baking or cooking in December? I hope it’s something you love or that someone you love always made — so their memory lives on in your kitchen and at your table… If you don’t have their recipe, google it and see what you find. It often works or is at least close. XXOO
Alyce

Pingback: Pumpkin-Lentil Soup | More Time at the Table
Pingback: Pumpkin-Cranberry Bread | More Time at the Table