It’s a snow day. I don’t currently have a paying job–this isn’t to say I don’t work– but I’m still thrilled to think I needn’t go anywhere and perhaps could be excused from accomplishing anything. Too many years of kids in the house or teaching makes me stand up and cheer when the school closings begin. Usually I spend the day in the kitchen with a big pot of soup bubbling away –and I’m about to do that after I’m done with the blog– but today a little perking dream took life.

The neighborhood girls out for a stroll out front…

…and then joining the herd out back for lunch.
I have for a while thought of using the sheet pan meal idea for some sort of an Asian meal, but just hadn’t managed it yet. A few quiet snowy hours provided the time and the impetus. After all, I had to have lunch, didn’t I? A girl’s gotta eat. The dogs spent most of the morning snoozing…

…and why wouldn’t they? A quick foray into the side yard for Rosie-My-Paws-Are-Cold and a short walk for Mr. Tucker and they were done. I had the morning to my self and nothing better to do but cook away, which is exactly what I did.
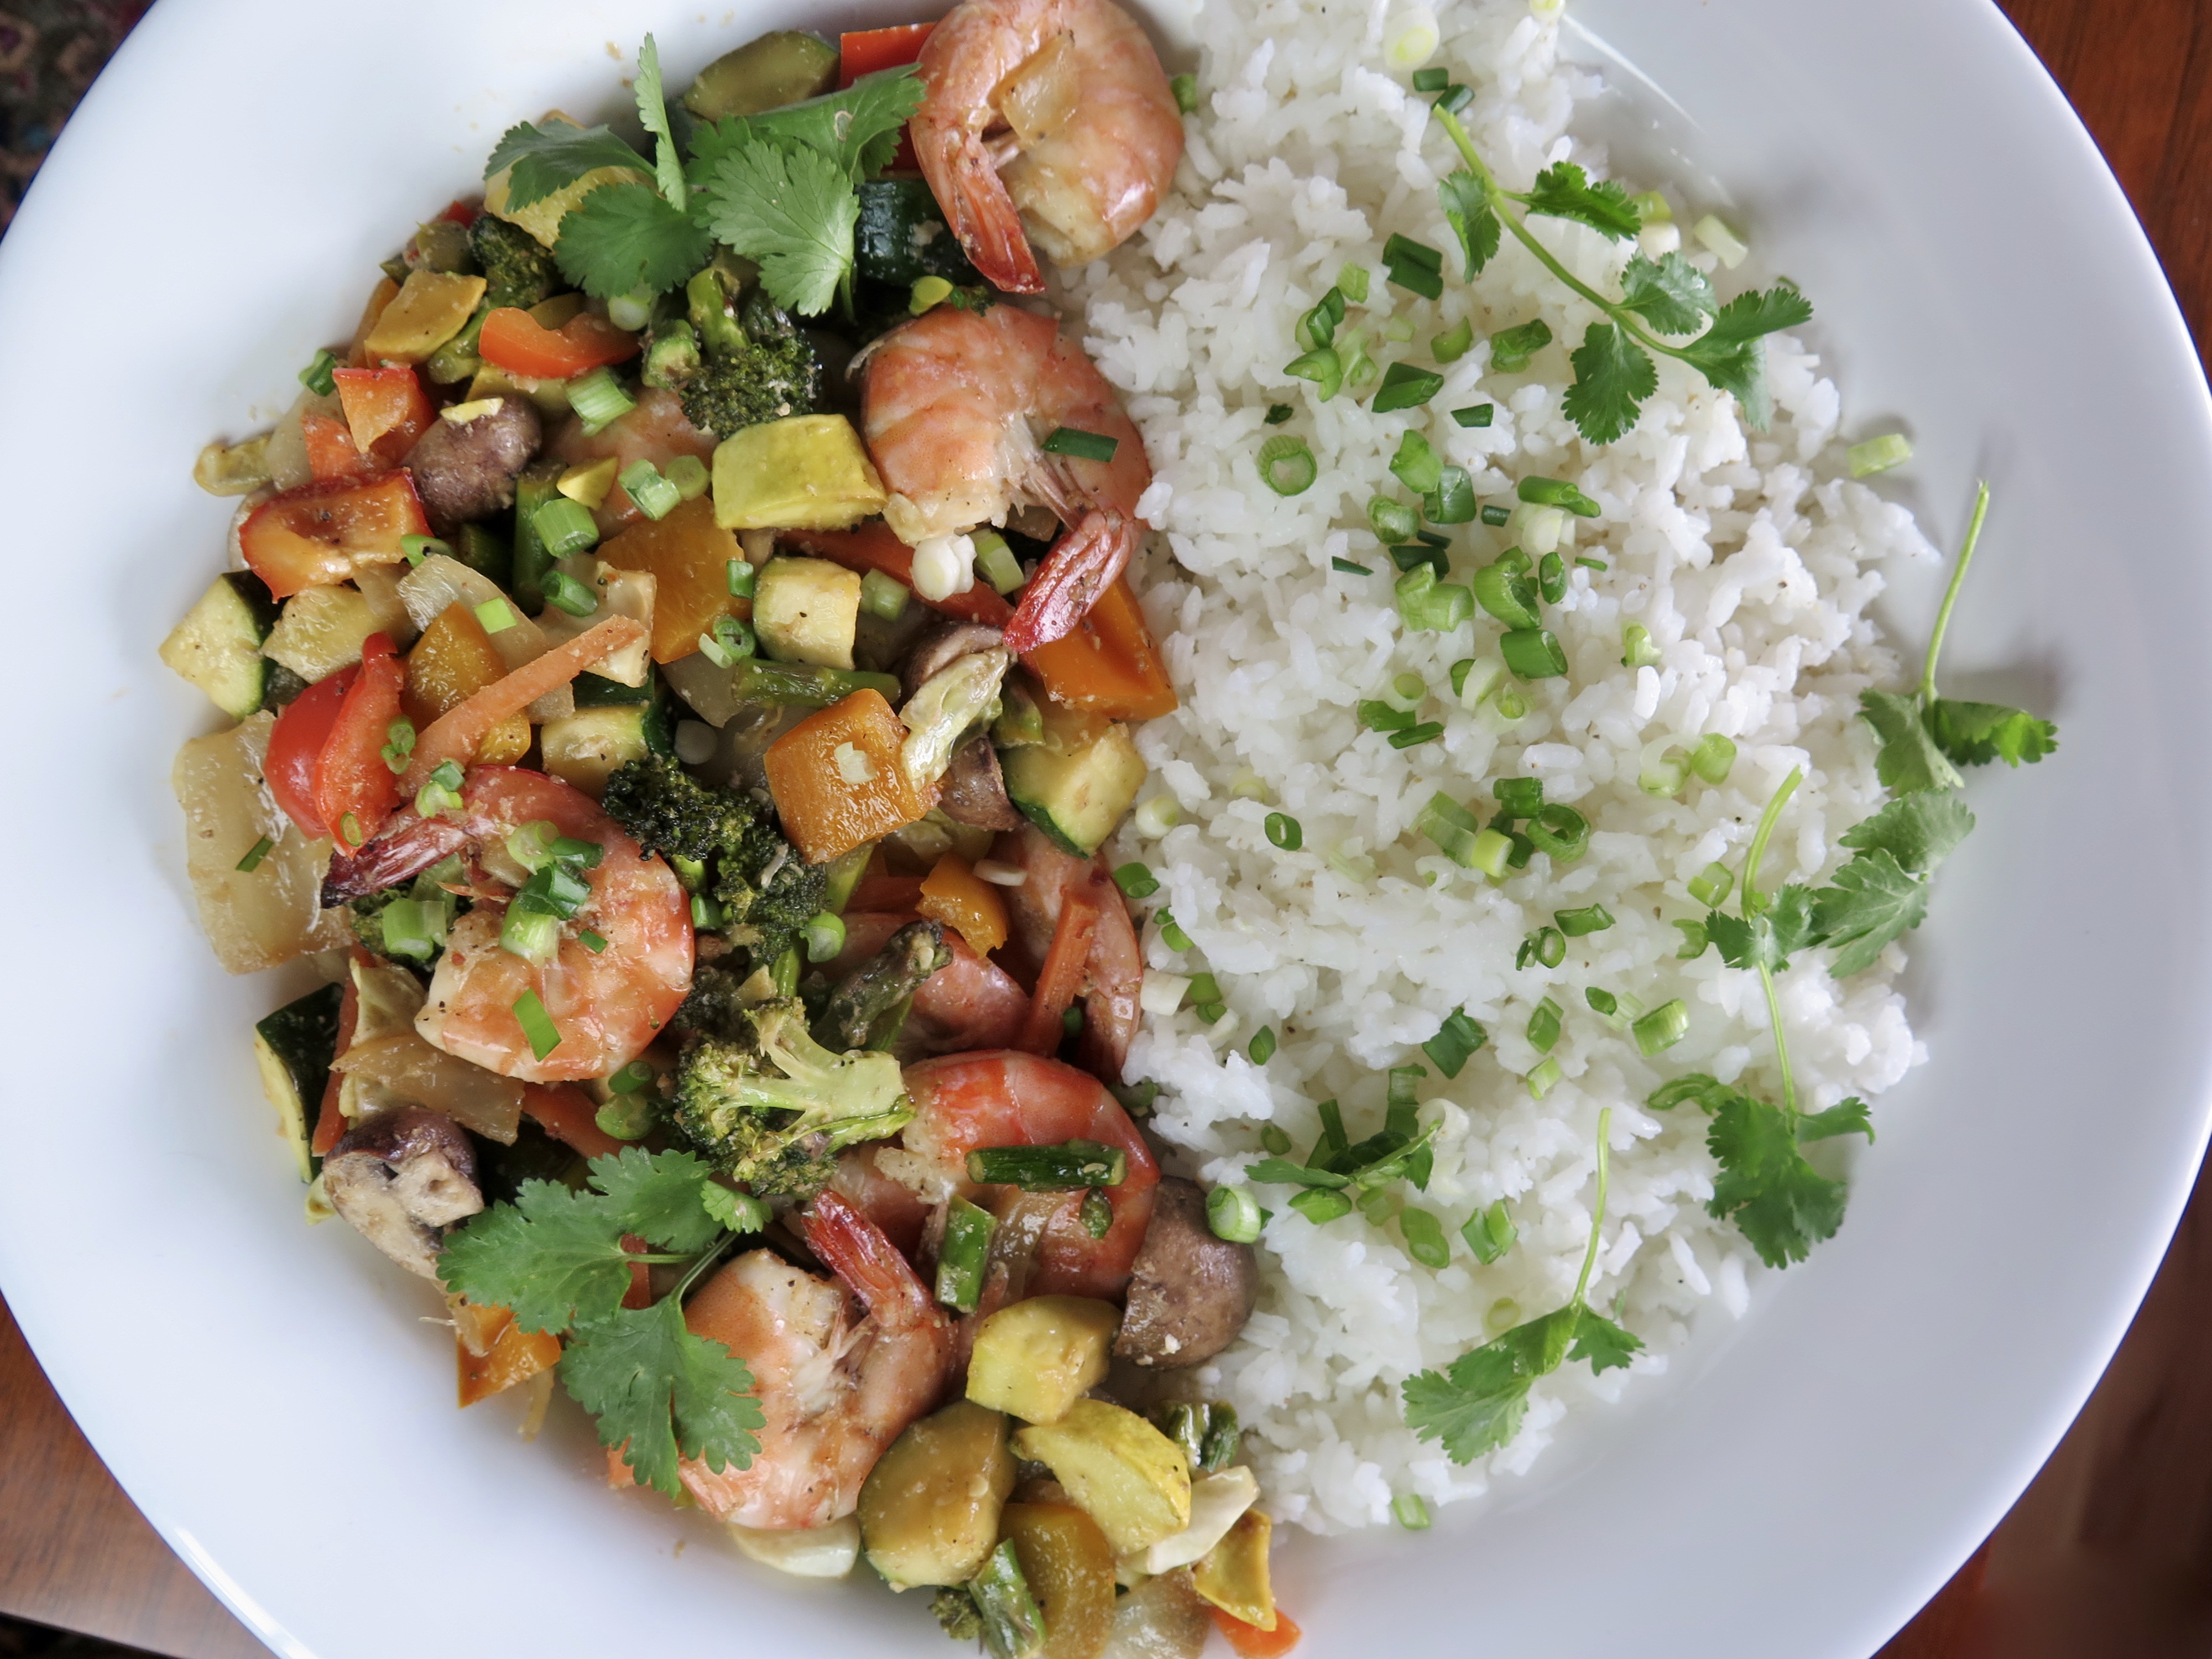
For my Sheet Pan Shrimp and Vegetable “Stir Fry”, you’ll need two rimmed sheet pans, some foil or parchment paper, a slew of your choice of chopped vegetables, a pound of shrimp (frozen is fine), and a lusty stir fry sauce you can whip up in a flash yourself. A hot oven, a big fun bowl, and you’re in business. No wok, no big skillet. No greasy spattered stovetop. No big clean up. If you line the sheet pans, you’ll just need to pitch the parchment/foil and wash the pans briefly.
Have vegetarian or vegan folks coming? This is the easiest meal to cook for both carnivores and veggie-only lovers. Scoop out the just veggie portion first and serve that before you add the shrimp. Et voila, dinner for all.
I didn’t try this yet with chicken, but I think it might work. You could give it a go and let me know what you think. I would try boneless thighs cut into bite-sized chunks, I think, which could be mixed with the vegetables on the sheets (unlike the shrimp which needed a shorter cooking time). Whichever way you go, just add a light white wine–something on the cusp of dry and sweet– or a Chinese beer and you’re good to go.
Anyway, get some shrimp and try this:

SHEET PAN SHRIMP AND VEGETABLE “STIR FRY” with or without rice serves 4
Who knew you could roast all those scrumptious stir fry ingredients in the oven? Start with the vegetables and add the shrimp in a second pan for the last several minutes. Use shrimp with peels if you don’t mind peeling them at table. Alternately, roast them without the stir fry sauce–you can then peel them and add them to the vegetables with the remainder of the sauce. You could, of course, cook already-peeled shrimp, but I don’t think they have quite the flavor of shrimp with peels.
- 3 cups hot, cooked rice — Scroll down for a discussion of rice
- 8 cups mixed fresh vegetables-your choice, cut into about 1/2-inch pieces*
- Canola oil
- Kosher salt and fresh ground white pepper -can sub black pepper
1/2 cup stir fry sauce, divided (recipe below)
- 1 pound shrimp with or without shells
- Minced green onions +/or fresh cilantro leaves for garnish
- Soy sauce to pass at table (Make sure this is Gluten-Free if you need it.)
-Preheat oven to 425 degrees Fahrenheit. Toss vegetables in a large bowl with a tablespoon of canola oil, 1/2 teaspoon each kosher salt and fresh ground white or black pepper, and 1/4 cup of the stir fry sauce. Spoon the vegetable mixture onto a large rimmed sheet pan lined with parchment paper or foil (or grease the pan.) Roast for 18-20 minutes or until nearly tender, but not well-done. (You’ll add the shrimp on a 2nd pan for the last 7-9 minutes of the vegetables roasting.)
-In the meantime, toss the shrimp in a large bowl with another tablespoon of canola oil, a light sprinkle of salt and pepper, and 2 tablespoons of the stir fry sauce. Turn out onto another large rimmed sheet pan lined with parchment paper or foil (or grease the pan.) Place on a second oven rack for the last 7-9 minutes of the vegetable roasting time or until shrimp are pink and are just barely firm. Do not over cook.
 -Turn the vegetables and the shrimp out into a very large bowl and drizzle with the remaining 2 tablespoons of the stir fry sauce. Toss together well, taste and adjust seasonings. Serve hot with or without rice, garnished with minced green onions and/or cilantro, as desired. Pass soy sauce at table.
*I used the following combination vegetables because I had them: zucchini, yellow squash, cabbage, red and yellow bell peppers, mushrooms, broccoli, asparagus, a few wilting baby carrots, and onions. You can naturally use the vegetables that most appeal to you (eggplant comes to mind), though I do think onions nearly essential. While this seems like lots and lots of veggies, remember that the oven shrinks them unlike sautéing.
STIR FRY SAUCE
- 3 tablespoons each: Sherry and Soy Sauce
- 1 tablespoon each: Minced garlic and ginger
- 1 teaspoon kosher salt
- 1 teaspoon honey
- 2 tablespoons canola oil
- 1/8 teaspoon crushed red pepper* (or to taste)
- 1/4 teaspoon freshly ground white pepper (can sub with black pepper)
Whisk together in a measuring cup.
*This sauce makes the meal a little spicy; there’s a kick, albeit a mild one. Want no kick at all? Skip the crushed red pepper totally.
ABOUT THE RICE:
If you’re making rice, do it the way you want to, of course. You might want to throw the simple and fast Minsley brown rice from Costco in the microwave– one packet serves 2. Or use up some leftover rice from your weekend outing to the local Chinese joint. But if you want really great rice for stir fry or any Asian meal, use the method described below. It sounds long and ponderous (it really just takes a long time to write out), but isn’t and is totally worth every movement and moment. (Make this rice ahead and let it dry out a bit to make fried rice.)
Making the rice
Start with inexpensive short or medium grain white rice that comes in a plastic bag if possible; it appears more and more difficult to find! Sushi rice will work. If all you have is long grain rice, plunge on ahead anyway and buy short or medium grain the next go-round. This method prevents the rice clumping and removes the starch to create a fresh taste and improved texture.
- Take 1 cup of rice and place it in a bowl; fill with cold water. Swish around 10-15 seconds. Drain in a fine-meshed strainer or pour water out while holding your hand at edge of bowl to prevent the rice escaping.
- Repeat 5-6 times until water in bowl is becoming or is clear. Shake rice well in strainer. (Don’t skip this step; it makes all the difference.)
- In a 2 – 2 1/2 qt. pot, place rice and 1 1/2 cups water (1 3/4 cup if you have long grain rice.)
- Bring to a boil over high heat. Reduce heat to medium-low or low and cover tightly.
- Let cook 15 minutes at sea level or 20 minutes at altitude (above 3,000 feet). You should be able to hear the rice bubbling and little wisps of steam should come from the pan. (Not big streams of water that hiss and run; turn that mess down.) If you don’t hear/see this, turn the heat up a tiny bit until you do.
- After 15 or 20 minutes, remove from heat (leave covered) and let rest for 15-20 minutes.
- Remove lid and fluff rice gently with a spoon or wooden paddle–not a fork– from the bottom. Salt and pepper with a light hand; this is the first layer of seasoning for fried rice, if that’s on your menu.
Lastly: According to Barbara Tropp (my go-to for Chinese cooking info), this will result in a perceptibly lighter, fluffier, cleaner kind of rice. In fact, it does, AND it’s delicious. You can well understand why Asians eat a pound a day! You’ll make rice like this always once you’ve done it. The rinsing takes just a few minutes to remove the starch and what’s a 20 minute rest after the rice has cooked if you’re making a meal? You can enjoy a glass of wine while you wait.
IF YOU LIKE THIS, YOU MIGHT LIKE MY:

Make a new stir fry,
Alyce
Pingback: 25+ Scrumptious Dishes to Jump Start Your Healthy January | More Time at the Table