Pie 101: Cherry Pie (for President’s Day)

58bfc-img_2567

On President’s Day, why not make a lovely cherry pie in honor of our first president, George Washington?  My favorite version is my own and is the one I bake for my sister Helen as she loves it so dearly–hence the name, “Helen’s Cherry Pie.”  As I just returned from spending Valentine’s Day with her, she’s on my mind.

photo-16

But there are a few others who love cherry pie and they know who they are–Kathie and Tom are two who come to mind.  In fact, Tom’s coming next week to visit and it’s his only request.  It’ll be ready. For a complete pie-making and baking lesson, click here for my Pie 101.

Scroll down for recipe, but first a few pictures to give you an overall idea:

Make the dough and roll out the first crust for the bottom of the pie:

f1cde-img_2566

Make the filling and spoon it into the bottom crust, then add the top. Continue reading →

Mom’s Turtle Cheesecake for a Special Son’s Birthday

IMG_4631

Welcome to the new More Time at the Table on WordPress.  Just moved from blogger and will post in both places for a while, but not for long.  Change your favorites and links.  Do Follow me here on WordPress!!  Please be patient while I work out the kinks on the posts that need help after the move. Great thanks to my beautiful daughter, Emily Morgan, who managed the migration.  Great to have smart kids!!  Follow Emily at FIGHT THE BEES.

♥♥♥♥

80eee-img_4348When your children are growing up, if you’re a baker (and sometimes even if you’re not), you bake a cake for their birthdays.  I wonder if that’s still true?  Most of the time my kids’ parties were simple affairs—celebratory and fun, to be sure–but sort of cake and ice cream parties for a bunch of their buddies or maybe even just the family and neighbors.

(below:  Sean, a marvelous cook, making his world-renowned pizza–one of my frequent requests.  He’s also a fine brewer.  Nice combination, huh?)

IMG_4304

IMG_4330

As they grew, and our budget expanded, we might have extended the celebration a bit to include supper out (pizza) or to have a sleepover with pizza ordered in.  But the cake remained.  Mom made the cake.  And it wasn’t always a cake, per se.

Sometimes there was a request for pie, cupcakes,  or even for lemon bars.  My famous brownies came up on the list.  Actually, they still do.  At one time, I taught myself to decorate cakes; I couldn’t afford the class.  My cakes always tasted better than they were decorated, but at least I could get someone’s name written and a border piped.  I did learn — somewhat — to draw on cakes and that’s incredible since I can’t draw at all. A carrot that looks like a carrot still appears on my carrot cake.  Leaves show up come fall and so on.  And my friends all know I’m good for a birthday sweet if they only say the word or tell me what they want.  I just like to have an excuse to bake.

(right, above and below:  Sean, the dog whisperer)

IMG_4571

Continue reading →

Stained Glass Shortbread Hearts

I used INDIA TREE Sparkling Sugar–Confetti “color.”

I have a group of favorite Christmas cookies and I make most of them every year.  Not all.  Some years there’s just no time for the cranberry bars and the candy canes do only make it into the round up every so often.  I’m not sure what gives one cookie a spot at the top of the favorites’ team or what makes another a relief pitcher, but I’m thinking it’s which little crispy piece of sweetness draws the most desirable oooos and ahhs from family and friends versus those that are still in the freezer at Easter. Continue reading →

38 Power Foods, Week 19 — Kiwi — Quick Individual Kiwi Tarts with Gingersnap Crust

An ultra thin ginger snap smothered with hot pastry cream serves as the “crust.”

How the Quick Kiwi Tart with Gingersnap Crust came to be…

While I love to bake a pie as much as the next woman (more than most, I’d guess), I also like nearly instant desserts that are luscious and don’t wear out the soles of your trainers.  (Like after you’ve cooked for company all day and still need dessert.)  I have a pocketful of favorites like a 30-second pumpkin custard (it’ll be in my soup book) and a blink-done  individual chocolate flourless “cake.” I also have no-bake favorites like a strawberry ice cream parfait layered with crumbled ginger shortbread and fresh peaches. In cases of real emergencies, I buy ice cream and cones–and not just for the kids.

But today I needed a kiwi something.  Not exactly in my bailiwick; I use kiwi in fruit salads or the occasional smoothie.  I kept picturing the industrial size, looks/tastes-like-Paris fruit tarts they sell at Marigold Bakery and Cafe in Colorado Springs.   The perfectly trained pastry chef turned out racks of these tarts daily–as well as many other pastries and breads.  You can’t count on him to spell your best friend’s name right on her birthday cake, but you can count on a piece of a tart at 3pm with your coffee or a full tart at 8pm for emergency company.  If you order ahead, you can get 12 for your son’s rehearsal dinner.  In other words, you can depend on that tart.  It’s topped with all the glories of many kinds of fruit.  But it’s not spring; it’s not summer.  Berries are over and I don’t need a BIG tart at all.  I need a T-tiny tart… (as my fine old friend Susan Gimarc would say)   Well, one for me and one for Dave.  Maybe two for tomorrow, though he usually gets all dessert leftovers.  But that’s it.  Enter the very petite and quick “Kiwi Tart with Ginger Snap Crust” made in a small ramekin.  The crust for each tart is one gingersnap at the bottom of a ramekin or small bowl.  Topped with hot pastry cream, the cookie doesn’t crumble, but softens into a beautiful crust made for a spoon.   Here’s how:

quick individual kiwi tarts with ginger snap crust   makes 4

Make a small pan of vanilla pastry cream (crème patissière, which is very like vanilla pudding). Recipe below.

Place one thin gingersnap in the bottom of each of four ramekins.
These are my favorite gingersnaps.  (Except for my own, of course)

Spoon hot pastry cream into ramekins.

If not serving right away, cover each tart with plastic wrap (pressing plastic down to cream) to prevent a skin from forming on the pastry cream.  Refrigerate for up to one day.  Otherwise, let cool a few minutes, and then go to next step:

Stand 3-4 slices of peeled kiwi in the cream. (Optional:  Heat 1 tablespoon apricot jam in microwave and brush kiwi with it.)  Serve immediately with extra ginger snaps if desired.

Ingredients List: 
3 kiwi fruit; each peeled and cut into four thin slices
4 thin gingersnaps, store-bought or homemade ( I like Anna‘s Ginger Thins.)
Pastry cream (below)
Optional:  1 tablespoon apricot jam
  
pastry cream recipe 
               from The New Basics Cookbook by Julee Rosso and Sheila Lukins*

  • 1 cup milk (whole or 2%)
  • 1/2 cup granulated sugar
  • 2 tablespoons cornstarch
  • 2 egg yolks
  • 1 tablespoon unsalted butter
  • 1/8 teaspoon salt
  • 1/2 teaspoon vanilla extract**

In a heavy saucepan, combine milk, sugar, cornstarch, and egg yolks. Place over low heat and, whisking, bring to a boil.  Cook another minute and remove from heat.  Stir in butter, salt, and vanilla extract.

*There are many pastry cream recipes, but a lot of them make a large amount of pastry cream and many more use a larger amount of egg yolks.  Use whichever you like best. This one has a very simple and streamlined process, is tasty, and makes just enough for these four tarts.  You could also, of course, use a low-fat, light pudding or custard recipe if needed.  Difference between pastry cream and vanilla pudding?  I can’t tell much, though sometimes vanilla pudding doesn’t have eggs.  The difference, however, between pastry cream and custard is that custard is 1.  thickened only with eggs (no cornstarch or flour) and is 2. cooked in a water bath (bain marie) in the oven, while pastry cream or vanilla pudding is a stove top process.

**You can also flavor pastry cream with a little brandy or Grand Marnier–try 1/2 teaspoon first and add a second 1/2 if needed.

about those kiwi

Calories:  108 calories per cup of kiwi

Kiwifruit is one of nature’s perfect foods: low in calories, high in energy and an excellent source of antioxidants. Each one delivers a world of nutrition benefits, including:

  • Vitamin C: Each serving of kiwifruit has nearly two-and-a-half times the recommended daily allowance of vitamin C, proven to boost the immune system and fight the effects of stress and aging.
  • No fat: Kiwifruit is fat-free, an important consideration in today’s healthy diets and a rarity among foods containing so many other nutritional benefits.
  • Fiber: Two kiwifruit contain more fiber than a bowl of bran cereal, the tasty way to maintain heart health, regular digestion and lower cholesterol.
  • Potassium: A serving of California Kiwifruit has more potassium than a banana, ideal for maintaining fluid and electrolyte balance and for releasing energy during exercise.
  • Antioxidants: Kiwifruit is an excellent source of antioxidants which are important in reducing your risk of cancer, heart disease and stroke.
  • Low glycemic index: With a glycemic index of 52, kiwifruit is a fat-free, low-carb fruit that’s safe for diabetics and a smart part of any weight-loss diet.
  • Magnesium: Two kiwifruit deliver 30 mg of magnesium, which improves nerve and muscle function while boosting your energy level.
  • Lutein: Kiwifruit contains the phytochemical lutein, which works to prevent age-related blindness and protect eyes from various kinds of damage.
  • Folate: With nearly 10% of the recommended daily value of folate, kiwifruit is a good way to protect the health of mother and baby during pregnancy while helping prevent birth defects.
  • Zinc: Men will appreciate kiwifruit’s zinc content, which helps produce testosterone, while everyone can enjoy its other benefits like healthy hair, skin, teeth and nails.

Vitamin E: Kiwifruit is one just a handful of fat-free sources of vitamin E, a powerful antioxidant that helps lower cholesterol and boost immunity. (Info and photo:  Courtesy California Kiwifruit Commission)  

^^^^^^^^^^^^^^^^^^^^^^^^^^^^^^^^^^^^^^^^^^^^^^^^^^^^    

Join our blogging group!

 Today I’m baking oatmeal chocolate chips for the reception after the Historic Organ Recital at Prospect Park United Methodist (where I work as a choir director).  It’s 7:30 tonight, Friday, October 19.  See you there.  A favorite activity, I did it last week, too…

  •   a blog repeat, but fun:
    Saturday, I baked oatmeal chocolate chips for the authors in town for Opus and Olives, one of the premiere literary events in the Twin Cities held each fall  at the Crown Plaza Hotel in St. Paul. (Mark Shriver said he’d eaten his six all in a row; he’d had no food in hours while traveling!)  Dave and I also went the banquet and enjoyed a fine meal with great folks while we listened to the each author speak.  (My favorite was Cheryl Strayed, but then again, I adored her book Wild: From Lost to Found on the Pacific Crest Trail.)

    Happy Tuck

    I also meet today for lunch with a wonderful editor/writer who I hope will be doing some editing on the book, 30 Soups in 30 Minutes.  This week– test on turnip soup (lovely–no details given away here) and lots of work in Microsoft Word, which isn’t nearly so fun as drumming up new soups in my kitchen.  Not sure we’ll be done with this little ditty by Christmas, but who knows?

    Sing a new song,
    Alyce

    38 Power Foods, Week 17 — Berries — Fresh Berry Cake

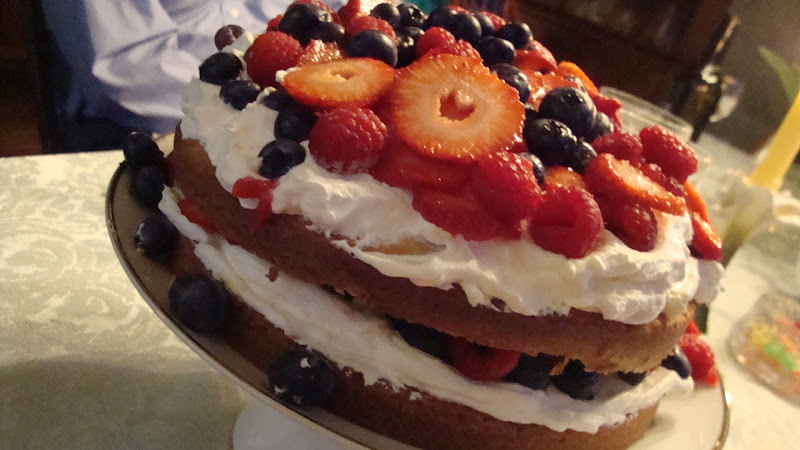
    Just looking at this cake will tell you that it’s not difficult to make and it’s NOT.  A quick glance at the recipe, however, might put you off.  Don’t let it.  There may be a little reading involved, but the cooking and baking are fairly simple and don’t take long.  In fact, though it’s two layers, you only bake one cake.  After it’s cool, you cut it in half.

    But listen, if you’re not a baker, this is just the cake for you… because you can get away without baking a cake at all!  Just buy a Sara Lee pound cake and cut it into layers–maybe three?–and do a loaf-shaped cake on a pretty rectangular tray.  Follow the rest of the directions for the berries and filling and there you are!   You could also bake a box cake into cupcakes, slice them, put half in a pretty coffee cup and decorate from there.  Whatever you do, this is a beautiful, tasty cake for Easter, Mother’s Day, or the Memorial Day picnic.  (Assemble this cake where you’re serving it.)  If you don’t have a special cake plate, don’t worry about it.  Whoever eats this will be happy no matter what.  Next time you run in Good Will, see a funky antique shop or a garage sale,  keep an eye our for great serving pieces.  No need to spend a fortune at the department stores. 

    Another idea comes from my mother-in-law, who, when I was  a young wife, often made a similar cake using a homemade or store bought angel food cake.  To cut calories, she used Cool Whip, but I can’t go that far.   If I’m eating cake I want to eat cake.  Let them eat cake!  But if you really must cut the whipped cream for health or allergy reasons, try the Cool Whip version.
    Cook’s Note:  While October isn’t prime berry time (there are still a few blueberries coming from upper Michigan and Canada), I made this earlier in the year and knew it would be perfect for the Power Foods Berry Post.  Save the recipe for next spring if you’d like to try it with all fresh berries.
    I made this for Mother’s Day and took it to a friend’s.  We all had a tiny slice with a huge cup of coffee. 

     Easy Berry Butter Cake (Aida Mollenkamp–courtesy Food Network)

    Difficulty: Easy | Total Time: 1 hr 5 mins, plus cooling time | Active Time: 25 mins | Makes:8 to 10 servings

    • For the cake:*

    • 1 1/2 cups all-purpose flour, plus more for coating the pan

    • 3/4 teaspoon baking powder

    • 1/4 plus 1/8 teaspoon fine salt

    • 8 tablespoons unsalted butter (1 stick), softened, plus more for coating the pan

    • 1 cup granulated sugar

    • 2 large eggs, at room temperature

    • 1/2 cup whole milk

    *Or use a purchased cake like Sara Lee Pound Cake

    • For the filling:

    • 1/2 cup mascarpone cheese, at room temperature

    • 1 cup heavy cream

    • 1 tablespoon granulated sugar

    • 1/2 teaspoon almond extract

      To assemble:

      • 1 1/2 pounds mixed berries*, washed (if you’re using *strawberries, they’ll also need to be hulled and quartered)  You might not need quite this many berries; mine didn’t fit on the cake. 
      •  
      INSTRUCTIONS
      For the cake:
      1. Heat the oven to 350°F and arrange a rack in the middle. Coat an 8-inch round cake pan with butter and flour, tap out the excess flour, and set the pan aside. Combine measured flour, baking powder, and salt in a medium bowl and whisk until evenly combined; set aside.
      2. Place measured butter in the bowl of a stand mixer fitted with a paddle attachment and beat on medium high until light in color and fluffy, about 3 to 5 minutes. Add sugar and continue to beat on medium high until white in color and the texture of wet sand, about 3 minutes more.
      3. Add eggs one at a time, letting each incorporate fully before adding the next. Stop the mixer and scrape down the sides of the bowl with a rubber spatula. With the mixer on low, add half of the flour mixture. Mix just until incorporated, then add milk and continue mixing until smooth. Add the rest of the flour mixture, mixing just until incorporated, about 2 minutes more.
      1. Scrape the batter into the prepared cake pan. Bake until a cake tester inserted into the center comes out clean, about 40 minutes. Transfer to a wire rack to cool, about 15 minutes. Run a knife around the perimeter of the cake and turn out onto the rack, right side up, to cool completely. Meanwhile, make the filling.
      For the filling:
      Place mascarpone in the bowl of a stand mixer fitted with a whisk attachment and whip on medium speed until smooth, about 1 minute. Add cream, sugar, and almond extract, increase speed to medium high, and whip until ingredients are combined and firm peaks form, about 15 seconds more. Cover and refrigerate until ready to use.
      To assemble: *

      1. Slice cake in half horizontally using a serrated knife. Divide filling evenly between the cut side and the top of the cake. Divide berries evenly over the filling. Stack cakes on top of each other and serve.


      If using a purchased cake like frozen Sara Lee pound cake, you might want to slice it (into thirds, perhaps) while it’s still partially frozen.  (Recipe first posted in May of 2012)
       

      Note:  I’ll share with you that whenever I’ve made a recipe by Aida Mollenkamp, it’s been incredible.  I don’t see her on Food Network anymore; is she still on?  But she does have a lot of recipes.  One that immediately comes to mind is her lasagna. Can’t make that very often.
       

       I like berries because of all the things they can do for us…provide tons of vitamins, fiber, antioxidants,  memory ability boosters, and more…  But I also love them because they’re gorgeous, inexpensive (relatively),  taste incredibly good, and are low in calories.  Many of them are also easy to grow at home.  And while we’re out of berry season in most places in the country, I just got a couple of pints of Michigan blueberries much like the tiny wild Maine berries that are often lusciously sweet-tart and make such great pancakes and muffins.  For more on berries and why we should eat them, click here. 
        ^^^^^^^^^^^^^^^^^^^^^^^^^^^^^^^^^^^^^
       I blog with a great group of writers every Friday where we cook our way through the list of foods from Whole Living Magazine’s Power Foods:  150 Delicious Recipes with the 38 Healthiest Ingredients:    Read more about beautiful berries this week at these sites: 
      Ansh – SpiceRoots.com  
      Minnie Gupta from TheLady8Home.com

      Sarah – Everything in the Kitchen Sink
      .
      Want to join us?  We’d like to have you as part of the group.  Get in touch with Mireya from My Healthy Eating Habits:  Mireya@MyHealthyEatingHabits.com


      ^^^^^^^^^^^^^^^^^^^^^^^^^^^^^^^^^^^^^^^^
      Need some fall love?
      Try reading this week on my Dinner Place blog (Cooking for One):
      Sing a new song,
      Alyce
      P.S.  Fellow blogger @donteatalone.blogspot.com,  Milton Brasher-Cunningham, has just published a book you might be interested in:
      Check it out!


    Homemade Vanilla Ice Cream with Blueberry-Lemon Sauce

     I’m not a big plain homemade vanilla ice cream fan; I like coffee ice cream.  But add some beautiful hot fudge or sliced fresh peaches and I’ll eat vanilla.  I’ll even make it.   And it does fill the bill for a crowd.   It pleases nearly everyone.

    When it’s northwest blueberry time (warm days/cool nights make the best berries), I’m likely to make some fresh, quick blueberry jam for toast.  For years, I’ve filled freezer bags or containers full of these berries and kept them until blueberry season (not the Chilean season) begins again. (Store frozen and unwashed; rinse just before using them.)  I’m able to make great muffins, pancakes, or top my yogurt all year long without resorting to Fed Ex fruit.  Regular readers know my drill.  This year, I went for a beautiful blueberry topping (similar to the jam or conserve of other years) for that ice cream, but paired it with a bit of lemon to offset the sweetness of the blueberries.

    A bloom bursting on beautiful blueberries!

    This recipe is for a crowd; it makes a gallon and could be increased by 1/2 to make 1 1/2 gallons or the 6 qts in the White Mountain ice cream maker.  Bring it to a picnic and people will be if not swooning, at least very happy.  We took this sweet, cold dessert down to a neighbor’s the other night to serve after an al fresco supper on their back deck.  A hot day, it was also a fairly warm evening.  We were all glad of something frozen for dessert.  What else for summer?

    Here’s how:

    Make the custard.  Eggs must cook, of course.

    Cool hot custard mixture in an ice water bath and chill in frig for a few hours or overnight.

     Place ice cream maker with custard mixture in tub to keep ice from flying around garage.

    Add ice and freeze!  (This machine comes in a hand-crank version, too.)   In the meantime, make the sauce.


     vanilla ice cream and blueberry lemon sauce

    Ice Cream :  makes 1 gallon approximately or 16  1/2-cup servings

    Ice cream must chill for several hours before freezing; start early in the day needed (or night before)

    *3 cups whole milk
    *3 cups heavy cream
    *2 cups 1/2 and 1/2
    *1/4 t table salt
    *1T vanilla extract (Use the best real vanilla extract you can find; I like Nielsen-Massey Madagascar Bourbon Vanilla)
    *1 1/2 cups sugar

    *10 egg yolks, beaten in another bowl

    1. In a 6-8 qt stockpot, heat  milk – sugar until steaming; do not boil.  Lower heat a bit.
    2.  Starting with 1-2 T, whisk some of the hot milk mixture into the beaten egg yolks.  Add another 6-8 T, 2 T at a time, until eggs are tempered or warmed up enough so that they won’t cook when added to milk mixture.  Slowly pour the egg mixture, whisking all the while, into the milk mixture.
    3. Cook over low heat until mixture barely thickens and coats the back of a spoon. Remove from heat and stir for a few minutes; the custard will continue to cook.
    4.   Strain through a fine sieve into another pot sitting in a bowl of ice water.  When cool, place in refrigerator for several hours or overnight.  Chill your freezer’s ice cream container before pouring the custard into it immediately before time to make the ice cream.
    5.  Freeze in gallon ( 6qt ) ice cream freezer according to freezer directions.

    Note:  I like fresh, made-that-day ice cream, but if you need to store it or want harder, firmer ice cream, store in a container without a lot of extra space.  Pack the ice cream in tightly and seal very closely before freezing.  According to David Lebovitz (The Perfect Scoop and davidlebovitz.com ), ice cream should be stored 2-4 months with the exception of custard, which does not keep long.  As this is custard (has eggs), invite the neighborhood and make sure it’s all eaten so there’s no worry.

    Blueberry-Lemon Sauce
     Watch out!  Blueberries don’t just stain, they dye!

    *2#  blueberries, cleaned and picked over, stems removed
    *3/4 cup white  sugar                                             
    *1/4 cup water
    *1t grated lemon zest

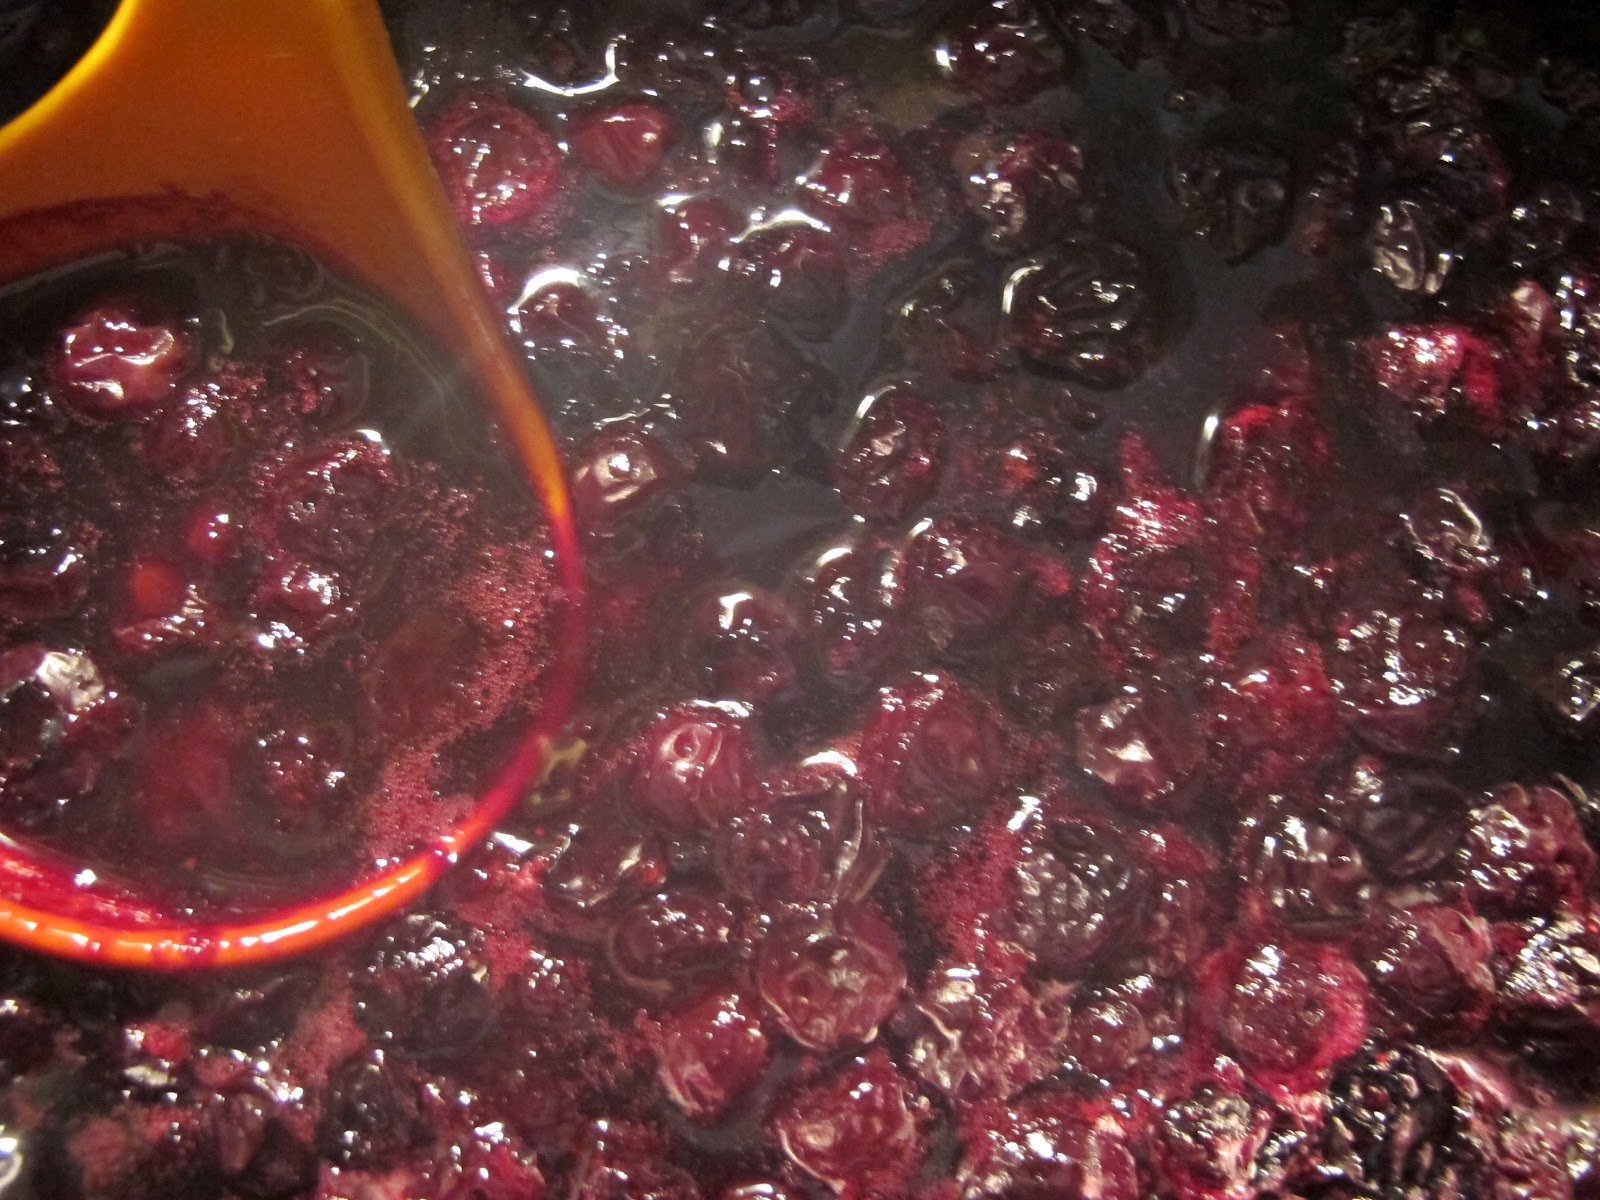
    Place all ingredients in a large saucepan and bring to a boil over medium heat, stirring occasionally.    Reduce heat and simmer until berries are popping and mixture has thickened somewhat. Stir regularly.  Remove from the heat and let cool; mixture will continue to thicken.  Cover and refrigerate if not using within an hour or so.  You’ll have more than you need for the gallon of ice cream.  Use the remainder for pancakes or spread on toast with peanut butter.  Use within 3-4 days.

    Sing a new song,
    Alyce
    ~~~~~
    right now on my Dinner Place Blog–a one-dish side or vegetarian lunch:

    Green Beans, Mushrooms and Jasmine Rice with Tarragon and Mustard Vinaigrette

    Pie 101 – Derby Pie

    “Derby” Pie or  Pecan-Chocolate-Bourbon Pie.  Can you say decadent?

    When someone needs something baked, I do it if I can.  If I have the time.  Not everyone bakes.  I love to bake and need an excuse now that there are only two of us in the house.  If I bake for an event, I somehow always manage to make enough so that we can share a sample or even have a tiny sweetness for ourselves.  (If it’s pie, it’s usually for Dave; I eat a bite, that’s it.  He loves pie too much for me to eat much.)

    (Aside:  After I saw how many people read my basic Pie 101 post, I thought I’d begin a series (quite intermittent) on pies.  I hope  you like them.  Anywho, read on.)

    Dave’s baby pie in a 4″ ramekin.  He was so relieved.

    My friend Roberta likes to give Kentucky Derby parties and her pie baker was a no-show.  I was happy to have an afternoon in the kitchen, though I had never before baked Derby Pie.  I had baked many a pecan pie (the easiest pie to make except for custard and, by the way, pecan pie is a kind of custard pie as it contains eggs and melted butter) and this didn’t look much different–once I figured out what it was.  And while it wasn’t terribly different, it sure tasted differently.   Think of pecans.  Then think of what they taste like sweetened up a little.  Add chocolate.  Bourbon.  You have the picture.  And oh, how lovely this would be for Thanksgiving.

    I don’t know from bourbon, but this is what I bought.

    But to begin with,  I  couldn’t locate a recipe in any one of my many cookbooks.   A bit embarrassing.  But not much.

    This is my cookbook corner.  That’s not all of them, of course.   And no Derby Pie. Hmph.

    I thought it was odd that there was no “Derby Pie” even in any of my baking books; I have a few baking books!  Back to the computer to discover that “Derby Pie” –or the term itself– is patented and can only be baked by the Kern family in Louisville, Kentucky.  In other words, they have a monopoly on it.  Once I knew exactly what Derby Pie was, I began to look on other sites for a recipe.  I found dozens –some too simple and some too complicated– and settled on one (below) from examiner.com, a site I wrote for for a few years.  It looked like a recipe I could easily triple or quadruple, which was my day’s goal.

    Warming the eggs in warm water since I forgot to take them out the night before.  Room temperature eggs are needed for baking.  I left them about 10 minutes.  Warm eggs crack easier and are less likely to leave bits of shell in your bowl.
    Collecting the pie plates.  I keep a couple in my kitchen and the rest downstairs. I use pie plates for a lot of cooking.  They’re perfect for anything in the microwave (vegetables, leftovers) and I bake biscuits in them because you can take the Pyrex plate to the table and the biscuits stay warm.  I almost always use glass pie plates for even baking and for seeing the crust when checking to see if the pie is done.  Do not ever use disposable aluminum pie plates; they’re just too shallow and lightweight.
    Toasting all the pecans at once on a half sheet pan.  I like to buy pecans in the fall from Georgia growers.  Often churches sell pecans for fundraisers.  Buy enough for the year then and freeze them.  I make a lot of spicy pecans for Christmas and also at other times of the year for nibbles with wine. (below)

    Here I’ve mixed them with other nuts for gift giving or cookie trays.  Recipe here.

    For photos of the making dough portion, turn back to my Pie 101 (Step-by-Step) or use your own favorite.  My own dough recipe–scroll down.  Do not use a sweetened dough here.

    Dough in all four pie plates, including the baby pie for Dave.
    Mixing each pie’s ingredients separately to make sure each pie has enough of everything.
    Carefully filling the shells so that I don’t spill the filling onto the pie dough.  Some people do this on the oven rack.
    This one is baked in a deep dish stoneware plate from Pampered Chef.  Emile Henry also makes a good deep dish plate.

    Glass Pyrex plate

    Side view of deep dish pie.

    The baby.  You can bake pie in about anything that’s oven proof.  Apilco (French porcelain–excellent dishes for everyday and any day) makes large coffee cups that are oven-proof–as does Corning Ware.

    The whole gang all done.    Enough for a Kentucky Derby Party.    How about Thanksgiving?

    derby pie

    • Recipe for 10-inch Single Crust Pie Crust  (see below for my crust recipe or use your own)
    • 1/2 cup butter (1 stick), melted (and cooled or it’ll cook your eggs)
    • 1/4 cup white sugar
    • 3/4 cup brown sugar, packed
    • 3/4 cup Karo light corn syrup
    • 4 large eggs  (at room temperature)
    • 1 1/2 teaspoons vanilla  (I like Nielson-Massey vanilla; some prefer Penzey’s.)
    • 1/4 cup bourbon (You see -above- I used Jim Beam.  You may know more and choose better.)
    • 3/4 cup gourmet chocolate chips (I use Guiradelli or Guittard; Callebaut is lovely, but pricey and hard to locate.*)
    • 1 1/4 cup toasted pecans or walnuts, shelled and chopped in half if desired

     How To Make Kentucky Derby Chocolate Pecan Pie

    • Preheat oven to 350 degrees F.
    • Roll crust according to my directions in the Best Ever Pie Crust Recipe, or use Alyce’s crust below,  or use a store bought pre-baked pie crust, line a 10-inch deep dish pie pan with the dough, and flute the edges as desired.
    • In a large mixing bowl, on medium speed with whisk attachment, whip butter, sugars, corn syrup, eggs, vanilla and bourbon together until frothy.
    • Remove bowl from mixer, and fold in chocolate chips and pecans or walnuts. Blend well.
    • Pour into prepared pie crust and bake at 350 for 50-60 minutes or until set.
    • Serve warm, or cool completely before serving with whipped cream or a scoop of vanilla ice cream.
    • Yields 8-10 slices.   Derby  Pie Recipe courtesy Donna Diegel, Examiner.com

    *You can also choose an excellent semi or bittersweet baking chocolate like Valrhona or Callebaut and chop your own chocolate if you like.  BTW, I sometimes order Valrhona chocolate from amazon.com though it is sometimes available at Whole Foods or better grocery stores.)

    Alyce’s Pie Dough Recipe:

    Pâte Brisée-— Made in a Cuisinart — This is the dough I use most often.
                                                            for each 10″ pie shell 
    1 1/3 cups all-purpose unbleached flour
    1 tsp salt
    1/2 cup or 1/4#  unsalted butter, very cold, cut into 8 pieces (1 stick) 
    1/4 cup ice water (measure 1/4 cup water into a 1 cup measuring cup half full of ice)

    Place flour and salt in the work bowl of the food processor fitted with steel blade.  Pulse a couple of times to distribute salt.  Add cold butter and pulse briefly several times until butter is worked into flour in several different sizes (1/4″ – 1/2″).  With machine running, slowly pour water through feed tube until dough begins to come together.  Stop machine and carefully remove dough from work bowl.  Working quickly to avoid melting the butter within the dough, form into a ball and then flatten into a disc.  Roll out and fill immediately (see above) or chill, well-wrapped,  1 hour or up to two days ahead. 

    Sing a new song; bake a new pie,
    Alyce

    Strawberry Shortcake for Memorial Day

    When it’s my friend Sue’s birthday, or at least if I can find one, I send her a birthday card with strawberries on it.  Sometimes I can’t find one.  Sue loves strawberries and so when I knew she was coming for our Mother’s Day cook-out, I knew what the dessert was going to be.   It’ll be just perfect for Memorial Day, too, though I’ll be busy making carrot cake sheet cakes for a graduation party.  (Carrot cake was one of my first posts as a blogger.  Things, luckily, have really improved!  If all goes well, I’ll take some better photographs than I did three years ago.)

    Taking vanilla bean out with my kids’ Mickey Mouse spoon.

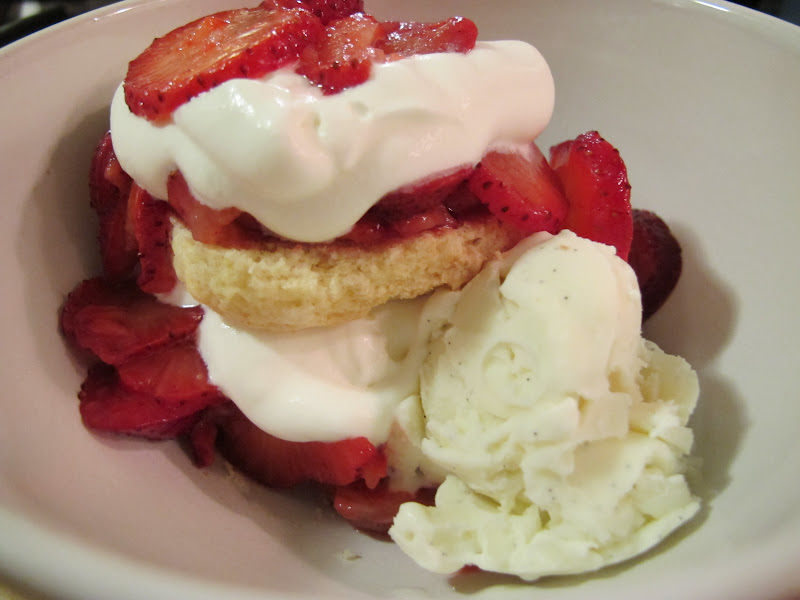
    I only make Strawberry Shortcake once or twice a year, so I try and make it light, layered with lots of ripe fruit, full of textural and temperature contrasts, and touched just enough by two kinds sweet cream–frozen and fresh whipped.  It’s a celebration  of the start of summer, though if we’re lucky, we have strawberries coming for a good part of summer in Minnesota.

    For the best Strawberry Shortcake, you need each ingredient to be fresh and/or the best you can find or make.  So for this dessert, I made the shortcakes as well as homemade vanilla ice cream. (Baby spoon used at right still in drawer and my kids are 25 and 34.  We’ve moved 20 times since the oldest was a baby, so it’s been through at least 20 kitchens.  Geez.)    Ripe strawberries (some mashed) and just-whipped cream, of course.   My other tiny, but critical element is a gentle smear of raspberry jam on each half of the sliced sweet biscuits we use for shortcakes.   This recipe makes enough for 8 with a few shortcakes leftover for breakfast the next day. (Slice them, spread with butter, slip under the broiler and serve with jam and lots of hot coffee.)


    Try this:

     strawberry shortcake with homemade shortcakes and 
                ice cream  serves 8 

    8 freshly baked and cooled shortcakes, each sliced in half (recipe below)
    1/2 cup best quality raspberry jam, room temperature
    2 qts ripe strawberries, stemmed and sliced.  Mash about 1/4 of the berries with a tablespoon of sugar
                 and mix the rest of the berries into the sugared ones.
    1 1/2 qts homemade vanilla ice cream*

    1 cup whipping cream, whipped with 1/4 tsp vanilla and a pinch of sugar

     To assemble...for each shortcake in a deep individual serving bowl or plate:

    1. Spread the two halves of the shortcake gently with a little raspberry jam, using about half a tablespoon for each half.  Place one half (jammed side up) in the bottom of bowl or plate and top with sliced strawberries.  
    2. Dollop in a little whipped cream on top of the berries and place the second half jammed shortcake on top.  Spoon on more strawberries and top with whipped cream.
    3. Garnish with a couple strawberry slices.
    4. Add a generous scoop of vanilla ice cream to the side of the cake and berries or on top, if you wish.
    5. Strawberry shortcake is good with a cup of coffee.

     *I made Jeni’s Ugandan Vanilla Ice Cream.  You can make any kind you’d like or even buy some best quality vanilla if you don’t have time to make it.  This recipe from epicurious.com is similar to Jeni’s, though Jeni’s has no eggs.

     My ice cream:

    Chilling the ice cream mixture.
    All frozen and ready for you in about 25 minutes.

    And the shortcakes:

    Making the shortcakes, which are like a sweet biscuit.
    Shortcakes cooling on the rack.  Don’t want them too brown.

    Recipe for Shortcakes from Fanny Farmer’s Baking Book, by Marion Cunningham:

    fluffy shortcakes makes 16

    • 2 cups cake flour
    • 1/2 t salt
    • 4 t baking powder
    • 1/2 t cream of tartar
    • 3 T sugar
    • 8 T butter
    • 1 egg, well-beaten
    • 1/3 c milk or cream,  plus droplets if needed  

        Preheat oven to 425 degrees F.  Get out 2 8 or 9″ round cake pans or a large baking sheet, but do not grease.

      Combine the cake flour, salt, baking powder, cream of tartar, and sugar in a mixing bowl, and stir ad toss them together with a fork or wire whisk. Cut the butter into bits and add it to the dry ingredients.  Then, using two knives or a pasty blender (I do this in the food processor.), or your fingertips, work the butter into the dry ingredients until you have a mixture of fine, irregular crumbs that resemble fresh bread crumbs.  Add the beaten egg and the milk all at once, and stir with a fork until the mixture just holds together.
        Turn out (it will probably be sticky) onto a smooth, well-floured surface, and knead 12-14 times.  Pat into a rectangle 1/2″ thick.  Cut the dough into squares or rectangles, using a knife, or into rounds with a 2″ cookie cutter.  Place the biscuits touching each other in the cake pans or on the baking sheet.  Bake for 15\to 20 minutes, or until very lightly browned.

    two-dog kitchen and around the hood or other stuff I’m cooking:


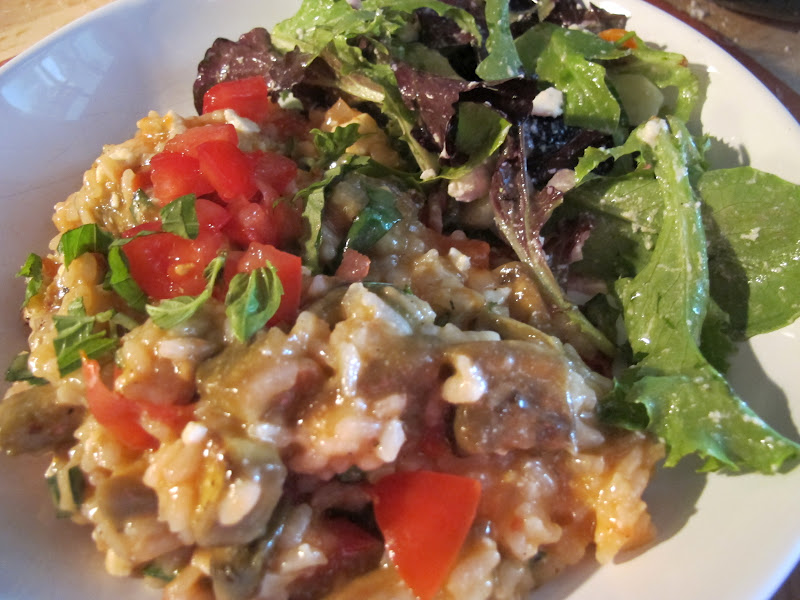
    I had fun making an eggplant risotto (lots of tomatoes and basil) and a little red-winey salad for dinner the other night.   I like cooking risotto when I’m not making five other things to go with it.  (I typically do asparagus risotto with filets for a celebration dinner, for example.)   With a nod to the food world’s discussion of how long it takes to make certain dishes, I’m with the group who wants to know, “Can we be honest about how long it takes to make risotto?”  My F&W recipe says 25-30 minutes, but the rice is still crunchy then and the broth isn’t all used.  Closer to 40 minutes was right, I think.  I find that I can do a few other things in the kitchen and stir periodically, I’m not chained that risotto pot.  Neither can I go cut some peonies or trail behind my husband down the stairs to the tv either.  I haven’t yet tried the oven version that was in Oprah’s magazine a couple of months ago.  This will be a lovely dish later in the summer when all these ingredients, including fresh basil, are in good supply at the Saint Paul Farmer’s Market. Now that I think of it, there’s a microwave risotto in the Fanny Farmer Cookbook that’s really good.   It’s actually called “Spinach and Rice,”  I think.  (That, after all these years,  is still my go-to microwave section — thanks to Marion Cunningham.) Lovely for summer–no heat.

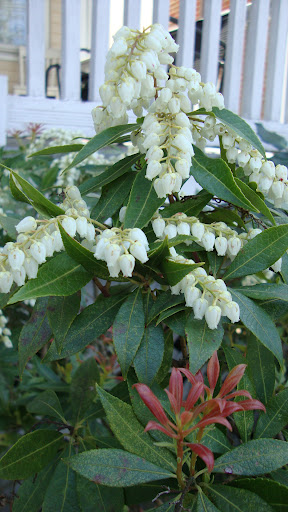
     Bleeding Hearts (I have pink and white) and Pansies…  
    I’ll decorate the sheet carrot cake next weekend with the edible pansies.

    One of these girls lays eggs so big they don’t fit in the carton!  (Top right corner)

    I got more eggs from Cathy’s ladies this week. (Cathy’s a friend and fine pianist whose family owns a terrific coffee business, Velasquez Family Coffee, in St. Paul)  I usually save them for an omelet dinner, poached eggs on grilled cheese tomatoes:

    or
    Poached eggs on grilled asparagus and mushrooms with hot balsamic vinaigrette
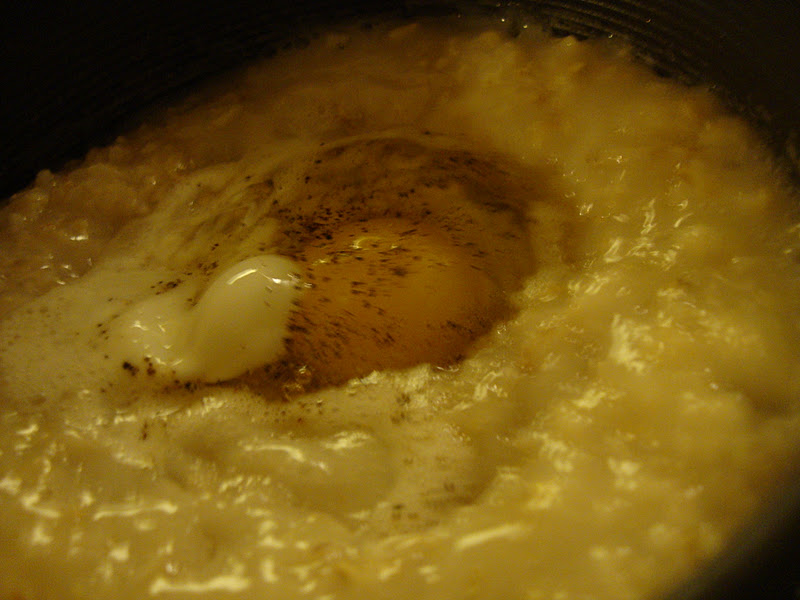
    or even Dave’s favorite, Porridged Eggs (on my dinnerplace blog)

     and I did make an omelet, but I also spread my wings and beat some up to use in making some fried chicken out of the Olives cookbook (the recipe is actually for cornish hens; I subbed boneless chicken thighs and served them with a spicy black bean-ham salad.)  This chicken is worth the price of the book.

    Tucker sneaking around the cookbook corner.  Red stool @ counter = my kitchen table!
    Hey, Mom!  Time to eat yet?
    These are my youngest peonies planted in the shade on the west side.  Must be moved to sun.  I have some on the south side that are literally on the ground because they’re so big and I don’t have a peony cage for them.

     
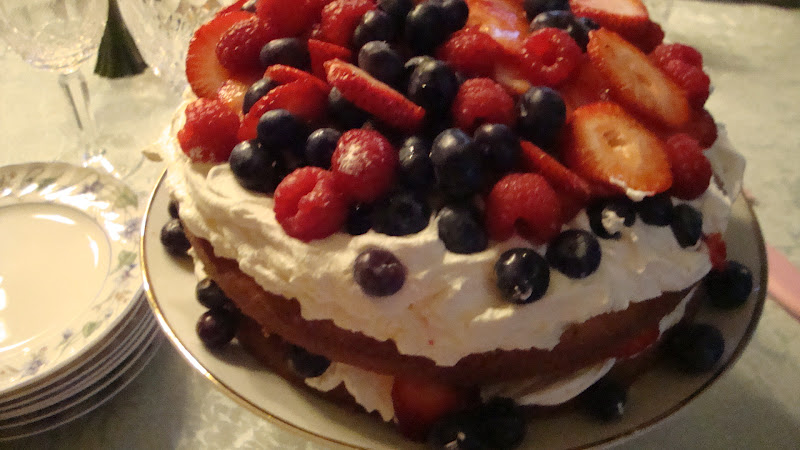
    If you liked this, I think you’d like my Fresh Berry Cake--.  Take the components separately to a Memorial Day Picnic. Make it with a one-layer butter cake sliced in half, or buy a Sara Lee (or bakery) pound cake, slice it horizontally, and serve a rectangular version.  Time for berries!  Recipe for Fresh Berry Cake courtesy Aida Mollenkamp, whose recipes–every one–have been delicious and spot-on.

    The other thing I get to do this week is make a BBQ Chicken Pizza for our 50 Women Game-Changers (Gourmet Live); this week–almost the end–is Foodspotting.  I really love making pizza, though I don’t do it often.  (My son Sean makes the best pizza I’ve ever eaten and I’m embarrassed to think how much pizza I’ve eaten.  And in how many countries!)

    A little guilty admission: I recently moved my computer to the basement temporarily and find I’m blogging while I watch Morning Joe, one of the few tv shows to which I’m addicted.  So as Joe holds forth and Mika never gets to say her piece, the blog gets written.   Thanks, guys.

    Sing a new song,
    Alyce

    Fresh Berry Cake for Mother’s Day–Bake or Not

    Looks like Mother’s Day!

    I hope you’re looking for a cake to make for your Mom for Mother’s Day.  If you are, you’re sooo wonderful.  What mom wouldn’t love someone who baked a great-looking and yummy cake like this?   I made it to take to a friend’s for Easter and took it unassembled as I wanted it as fresh as it could be. 

    Just looking at this cake will tell you that it’s not difficult to make and it’s NOT.  A quick glance at the recipe, however, might put you off.  Don’t let it.  There may be a little reading involved, but the cooking and baking are fairly simple and don’t take long.  In fact, though it’s two layers, you only bake one cake.  After it’s cool, you cut it in half.


    But listen, if you’re not a baker, this is just the cake for you… because you can get away without baking a cake at all!  Just buy a Sara Lee pound cake and cut it into layers–maybe three?–and do a loaf-shaped cake on a pretty rectangular tray.  Follow the rest of the directions for the berries and filling and there you are!   You could also bake a box cake into cupcakes, slice them, put half in a pretty coffee cup and decorate from there.  Whatever you do, this is a beautiful, tasty cake for mom or anyone.
    If you don’t have a special cake plate, don’t worry about it.  Whoever eats this will be happy no matter what.  Next time you run in Good Will or see a funky antique shop, keep an eye our for great serving pieces.  No need to spend a fortune at the department stores. 

    Another idea comes from my mother-in-law, who, when I was  a young wife, often made a similar cake using a homemade or store bought angel food cake.  To cut calories, she used Cool Whip, but I can’t go that far.   If I’m eating cake I want to eat cake.  Let them eat cake!  But if you really must cut the whipped cream for health or allergy reasons, try the Cool Whip version.

    courtesy Sara Lee Desserts

    Easy Berry Butter Cake (Aida Mollenkamp–courtesy Food Network)

    Difficulty: Easy | Total Time: 1 hr 5 mins, plus cooling time | Active Time: 25 mins | Makes:8 to 10 servings

    • For the cake:*

    • 1 1/2 cups all-purpose flour, plus more for coating the pan

    • 3/4 teaspoon baking powder

    • 1/4 plus 1/8 teaspoon fine salt

    • 8 tablespoons unsalted butter (1 stick), softened, plus more for coating the pan

    • 1 cup granulated sugar

    • 2 large eggs, at room temperature

    • 1/2 cup whole milk

    *Or use a purchased cake like Sara Lee Pound Cake

    • For the filling:

    • 1/2 cup mascarpone cheese, at room temperature

    • 1 cup heavy cream

    • 1 tablespoon granulated sugar

    • 1/2 teaspoon almond extract

    To assemble:

    • 1 1/2 pounds mixed berries*, washed (if you’re using *strawberries, they’ll also need to be hulled and quartered)  You might not need quite this many berries; mine didn’t fit on the cake.
    INSTRUCTIONS
    For the cake:
    1. Heat the oven to 350°F and arrange a rack in the middle. Coat an 8-inch round cake pan with butter and flour, tap out the excess flour, and set the pan aside. Combine measured flour, baking powder, and salt in a medium bowl and whisk until evenly combined; set aside.
    2. Place measured butter in the bowl of a stand mixer fitted with a paddle attachment and beat on medium high until light in color and fluffy, about 3 to 5 minutes. Add sugar and continue to beat on medium high until white in color and the texture of wet sand, about 3 minutes more.
    3. Add eggs one at a time, letting each incorporate fully before adding the next. Stop the mixer and scrape down the sides of the bowl with a rubber spatula. With the mixer on low, add half of the flour mixture. Mix just until incorporated, then add milk and continue mixing until smooth. Add the rest of the flour mixture, mixing just until incorporated, about 2 minutes more.
    4. Scrape the batter into the prepared cake pan. Bake until a cake tester inserted into the center comes out clean, about 40 minutes. Transfer to a wire rack to cool, about 15 minutes. Run a knife around the perimeter of the cake and turn out onto the rack, right side up, to cool completely. Meanwhile, make the filling.

    For the filling:

    1. Place mascarpone in the bowl of a stand mixer fitted with a whisk attachment and whip on medium speed until smooth, about 1 minute. Add cream, sugar, and almond extract, increase speed to medium high, and whip until ingredients are combined and firm peaks form, about 15 seconds more. Cover and refrigerate until ready to use.

    To assemble: *

    1. Slice cake in half horizontally using a serrated knife. Divide filling evenly between the cut side and the top of the cake. Divide berries evenly over the filling. Stack cakes on top of each other and serve.
    If using a purchased cake like frozen Sara Lee pound cake, you might want to slice it (into thirds, perhaps) while it’s still partially frozen.
    Note:  I’ll share with you that whenever I’ve made a recipe by Aida Mollenkamp, it’s been incredible.  I don’t see her on Food Network anymore; is she still on?  But she does have a lot of recipes.  One that immediately comes to mind is her lasagna.  Have mercy.  I could double in size eating that stuff.
    Need a great idea for Mother’s Day? 
          Send Mom an ecard and give to Share our Strength:  No Kid Hungry here.

    Sing a new song and bake/make an easy cake,

    Alyce

    50 Women Game-Changers in Food – #44- Nigella Lawson – Guinness Gingerbread

    A tender, quite moist gingerbread from Nigella.

    Gingerbread is Christmas, right?  Maybe New Year’s Day?  Certainly a cold-weather dessert.  Except that I love it.  I’d eat it in July if I were willing to turn the oven on.  Which I’m not.*  So that’s why it’s April and there’s Nigella Lawson’s gorgeous Guinness Gingerbread on the blog. (Two “n’s” and two “s’s” in Guinness–tells you  alot about how much I know about Guinness.  I did tour the brewery in Dublin once and actually drank a tall one.)  If you’ve been following along on this trip, I’ve joined a group of great food bloggers who are each week cooking, testing, and writing about one of Gourmet Live’s 50 Women Game-Changers.  And, you guessed it, this week (number 44) is Nigella’s week–I’m so grateful.  After all, I needed a reason to make gingerbread in the spring.  Didn’t I? (Cold and nasty in St. Paul today after a great, warm spring.  I was happy to have a warm kitchen.)
       *I have just installed a combination microwave/convection oven above my range.  This may help with summer baking.  More later!

    If you haven’t had the pleasure of watching Nigella on tv or reading one of her books, you just need to do it.  Picture a well-fed, very pretty British woman with a great accent sneaking out of bed in the dark to raid the refrigerator of crispy fried pork fat or snarfing down the last, well-hid piece of flourless chocolate cake.  Not only is she real with a capital R, but she’s fun and brings more than a bit of the seductive into the kitchen, where it surely belongs.  Whatever…it’s great to watch someone enjoy what they do and Nigella does that in spades.  Isn’t that what really draws us to people?  I adore friends who are happy in what they do.

    For a biographical sketch that may surprise you, check out Nigella’s Food Network biography page here.  Not only has Nigella been a food tv star for several years and written a variety of best-selling cookbooks, but she was Deputy Literary Critic of the (London) Sunday Times before setting out to follow her own drummer as a free-lancer.  No small apples.

    For a list of all of Nigella’s books, lots more info and recipes, check out her website.

    But!  If you’re intrigued by the gingerbread:   get out a 9×13 pan and get baking.  Easy as pie (which isn’t easy–who said that?)  you warm up some butter, a cup of Guinness stout and a couple of other things, whisk in a few dry ingredients, pour into a greased pan and bake for 45 minutes.  Cool, cut, and serve with whipped cream, ice cream, or Crème fraîche.  Nothing better.  My own notes are in red.  Enjoy!

    Guinness Gingerbread by Nigella Lawson

    Ingredients

    • 1 1/4 sticks 10 (tablespoons) butter, plus some for greasing
    • 1 cup golden syrup (such as Lyle’s) (I used Organic Corn Syrup plus a little Molasses.)
    • 1 cup (packed) plus 2 tablespoons dark brown sugar
    • 1 cup stout (such as Guinness) (There’s just a taste left for a chef’s snack!)
    • 2 teaspoons ground ginger
    • 2 teaspoons ground cinnamon
    • 1/4 teaspoon ground cloves
    • (I added 1/2 tsp fresh ground black pepper)
    • 2 cups all-purpose flour
    • 2 teaspoons baking soda
    • 1 1/4 cups sour cream
    • 2 eggs
    • 1 rectangular aluminium foil pan or cake pan, approximately 13 by 9 by 2-inches

    Directions

    Preheat your oven to 325 degrees F. Line your cake pan with aluminium foil and grease it, or grease your foil tray.

    Put the butter, syrup, dark brown sugar, stout, ginger, cinnamon and ground cloves into a pan (2-3qt saucepan)  and melt gently over a low heat.

    Organic Corn Syrup with a little molasses poured in…quite pretty.

    Dave was so sad that I bought a whole 6-pack.

    Take off the heat and whisk in the flour and baking soda. You will need to be patient and whisk thoroughly to get rid of any lumps.

    Whisk the sour cream and eggs together in a measuring jug (4c glass measuring cup) and then beat into the gingerbread mixture, whisking again to get a smooth batter.

    Pour this into your cake/foil pan, and bake for about 45 minutes; when it’s ready it will be gleamingly risen at the centre, and coming away from the pan at the sides.

    Let the gingerbread cool before cutting into slices or squares.

    Add sweetened or spiced whipped cream, Crème fraîche,  or a scoop of vanilla ice cream, if desired.  Just a winter dusting of powdered sugar is lovely if you’re into simplicity:

    For grin and giggles, watch this Nigella Interview:

    If you’d like to read more great recipes, try one of the other blogs on our trip visiting 50 Women Game-Changers in Food:

    Val – More Than Burnt Toast, Taryn – Have Kitchen Will Feed, Susan – The Spice Garden
    Heather – girlichef, Miranda – Mangoes and Chutney, Amrita – Beetles Kitchen Escapades
    Mary – One Perfect Bite, Sue – The View from Great Island, Barbara – Movable Feasts
    Linda A – There and Back Again, Nancy – Picadillo, Mireya – My Healthy Eating Habits
    Veronica – My Catholic Kitchen, Annie – Most Lovely Things, Jeanette – Healthy Living
    Claudia – Journey of an Italian Cook, Alyce – More Time at the Table
    Kathy – Bakeaway with Me, Martha – Simple Nourished Living, Jill – Saucy Cooks
    Sara – Everything in the Kitchen Sink

    Next week we’ll feature Diana Kennedy, the very fine Mexican cookbook author.  Join us!

    Sing a new song,
    Alyce